Education Library
Nextech Templates
-
Does your FIRST AVAILABLE tool provide accurate availability?
- Click the First Available icon in the tool bar.
- Enter a scheduling scenario in which would be available for Online Scheduling.
- When the scenario is run, is the availability offered correct & accurate?
-
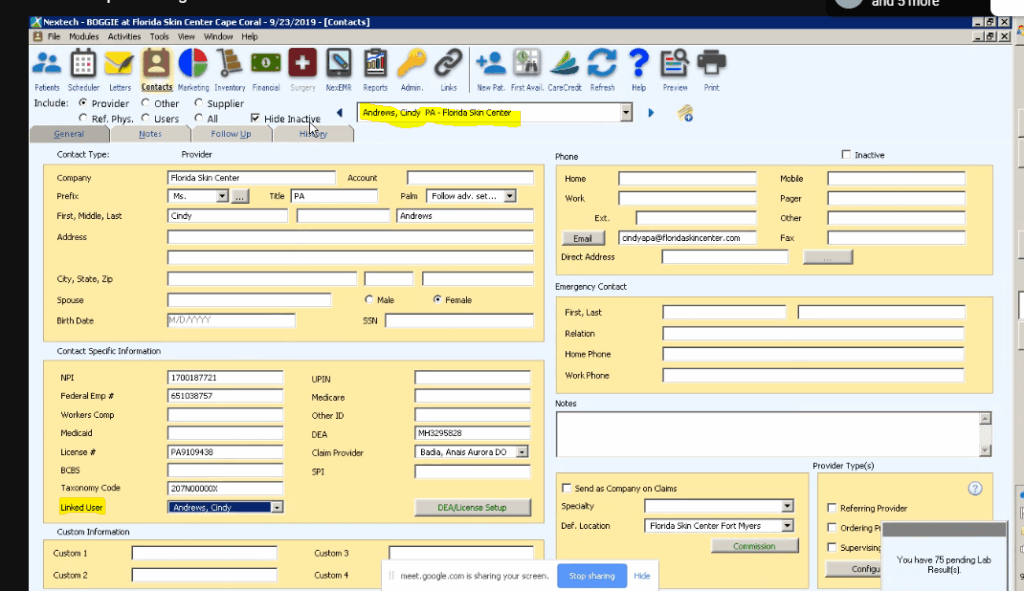
Does each provider have a linked user?
- Select Contacts.
- Select Provider by clicking the circle in the top left corner.
- Select the appropriate provider from the dropdown menu.
- In the bottom left hand corner of the contact specific information box, is there a linked user? If not, select the user from the dropdown menu.
-
Are providers linked to the location template?
- Check location templates & make sure all appropriate resources are available for that location.
-
Does each provider/resource have their own scheduler template?
- Check scheduler templates to make sure there is a template for each provider/resource.
-
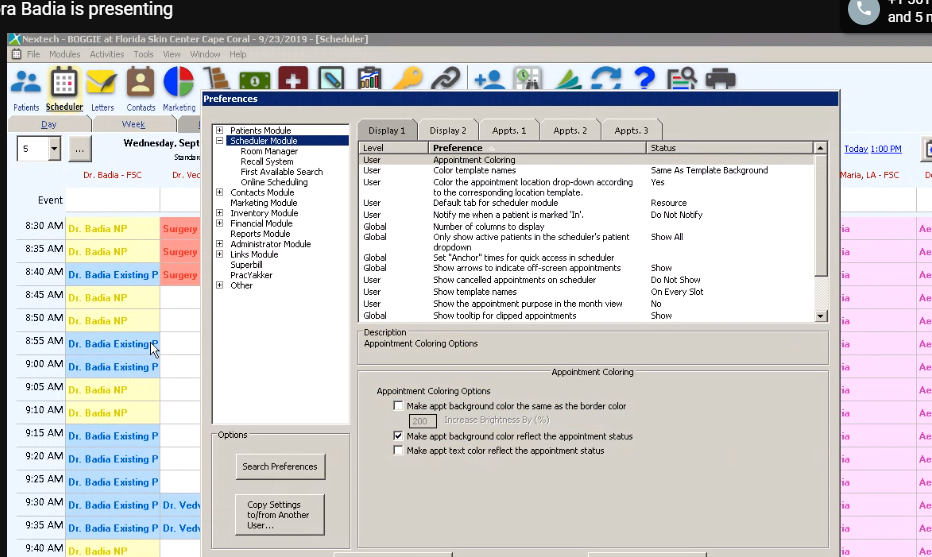
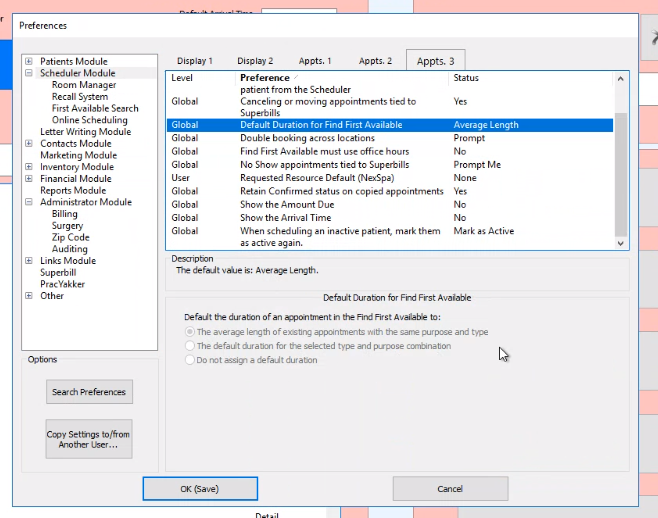
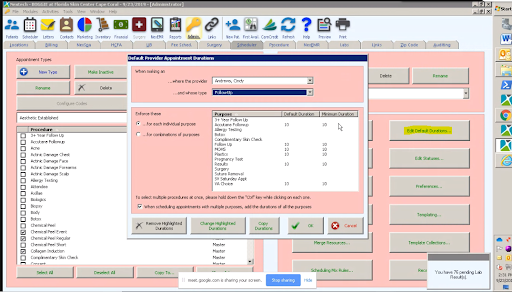
Are the default durations for appointment types & purposes accurate?
- Check the Admin scheduler tab for default durations for each appointment type & purpose that will be available for online scheduling.
-
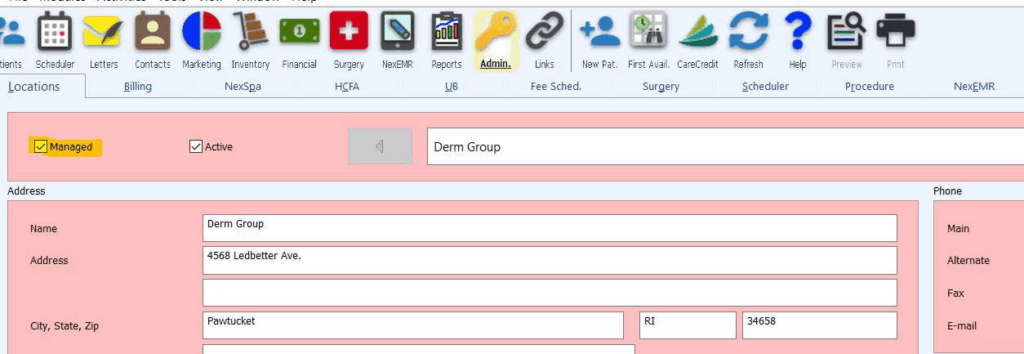
Are the locations marked active & managed?
- Check the Admin location tab for checked boxes in the top left corner for ACTIVE & MANAGE.
-
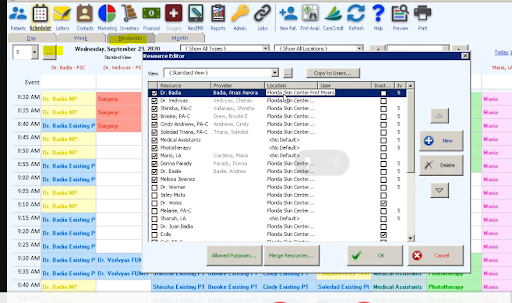
Are any providers tied to more than 1 resource?
- Go to the resource editor & make sure each provider is only tied to 1 resource.
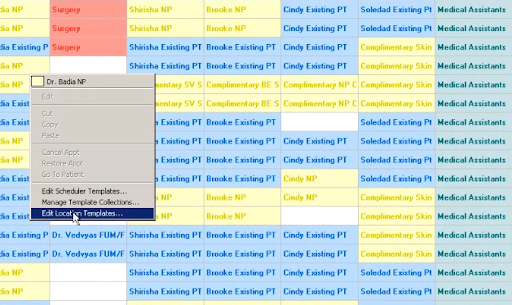
Check Location Templates
- Navigate to the schedule within Nextech.
- Right click and select Edit Location Templates
- Choose provider
-
Add time range

-
Done -> then location

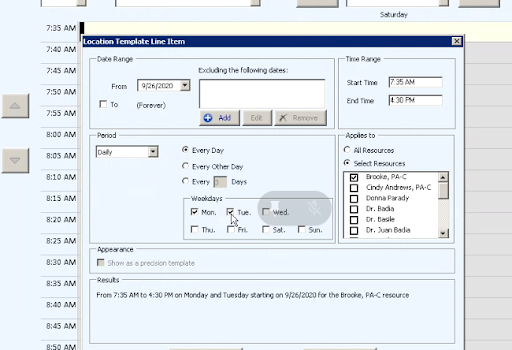
-
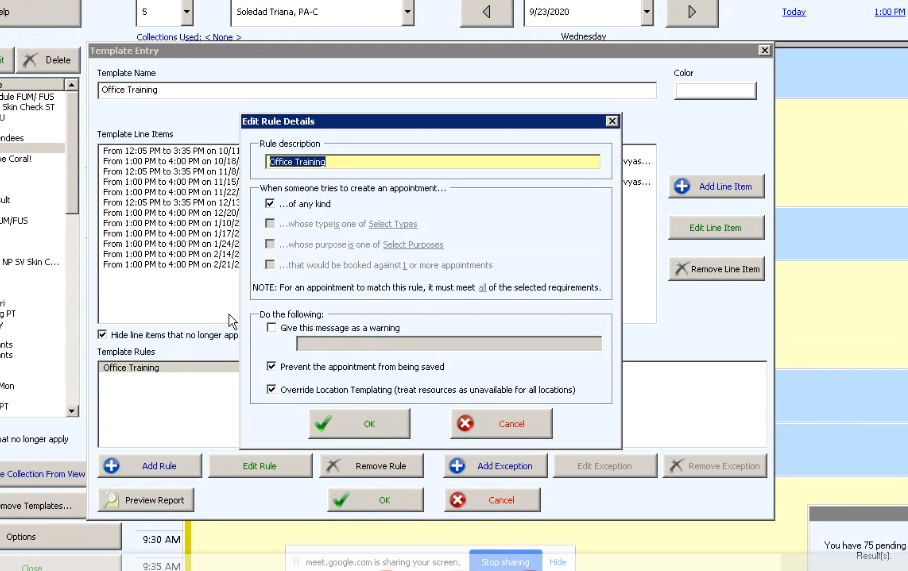
Add rule to template

Check Global Setting Preferences
- Navigate to Tools
- Select Preferences
- Select Scheduler Module
-
Select Online Scheduling

Provider
Make sure provider is active
Every Provider needs to have linked user Contacts > Select Provider by clicking the circle
IF clients have resources that they want to have scheduled, they need to also be in as a provider
Set Default Appointment Durations
- Go to Scheduler
-
Select Edit Default Durations (Default and minimum must match)
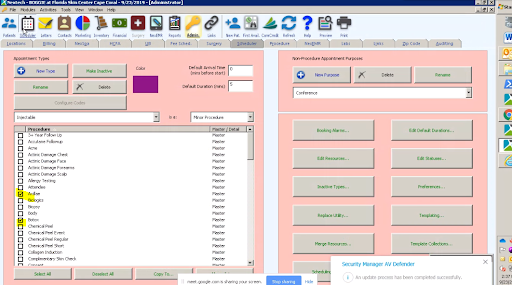
Add New Purpose
- Navigate to Procedures
-
Select New
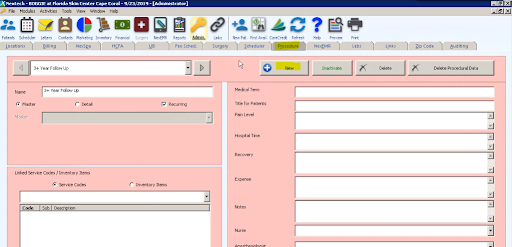
-
Once you add the procedure, go to the type and check off the box on the new procedure
Add Locations
- Select Locations
-
Select New
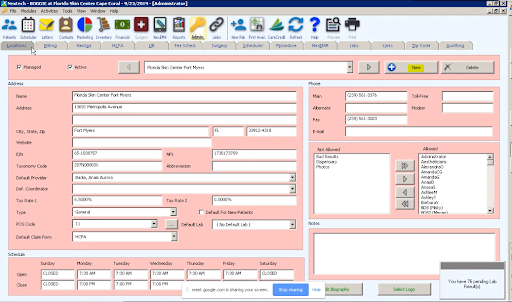
Active & Managed Locations
- Make sure the location is active
-
Make sure the location is Managed